Choosing Welding Patterns
Jan 24th 2024
Welding isn’t always just a simple fusion between two pieces of metal. Sometimes it requires a touch of art that involves intentionally arranging the molten metal to achieve a welding pattern. To create these patterns, the welder needs to repeatedly move the welding torch in a specific motion to weave the welding beads into a cohesive and intentional design in the final weld.
This final design can take many forms, depending on the type of welding pattern performed. It takes practice, patience, control, experience, and skill to successfully create a weld that is both visually appealing and strong enough to support the integrity of the structure. This guide will explore the intricacies of some of the most common welding patterns as well as factors to help you decide which pattern is best suited for the job.
Beyond the Bead: Understanding the Different Welding Pattern Types
All welding patterns display certain advantages and limitations in certain situations and applications. Some are easier to perform, such as the stringer weld bead, while others require expert-level welding. Understanding these aspects is crucial for welders seeking to achieve specific outcomes in terms of both strength and appearance regarding the welds they create. Let’s dive a little deeper and look at a few of the most popular welding patterns.
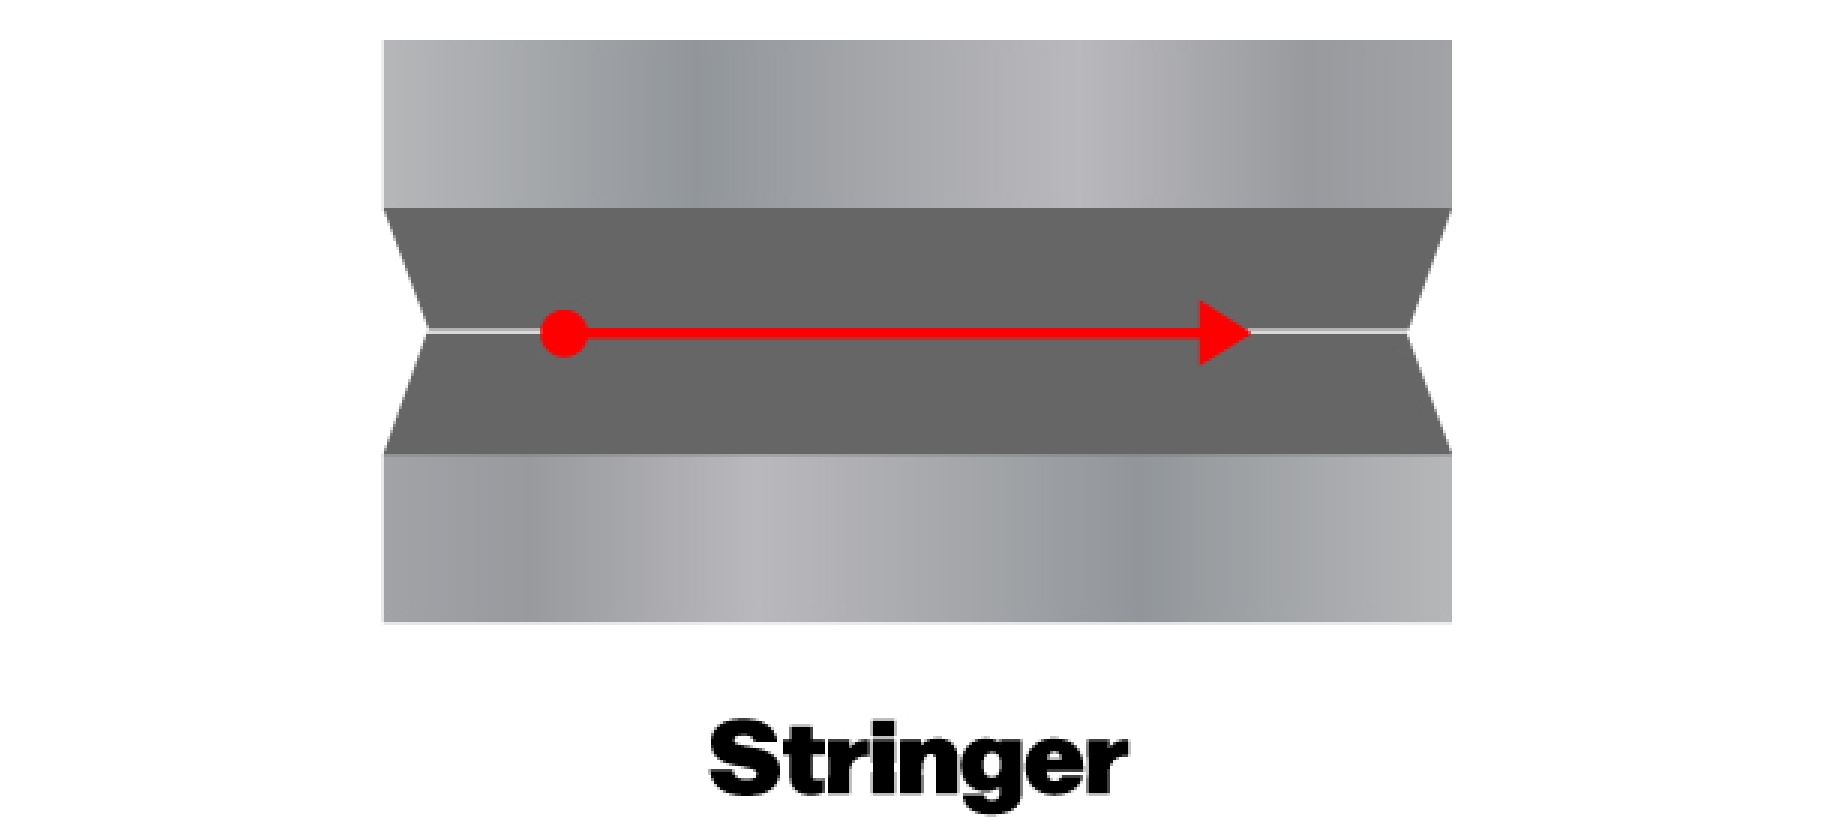
Stringer Weld
Stringer welds are one of the easiest and quickest welding patterns to learn and perform. It simply involves dragging the welding wire straight across the seam without any intricate weaving or movement. Although not the most pleasing pattern to the eye, it gets the job done by enhancing the strength of the weld. Maintain consistent control while welding to create a good, strong, uniform stringer bead.
- Advantages: Easy and fast to perform, versatile for any position and joint type, most efficient for long welds, offers higher deposition rates.
- Disadvantages: May be aesthetically displeasing, may have limited control over fusion compared to more complex patterns.
Square Weave/C-Weave
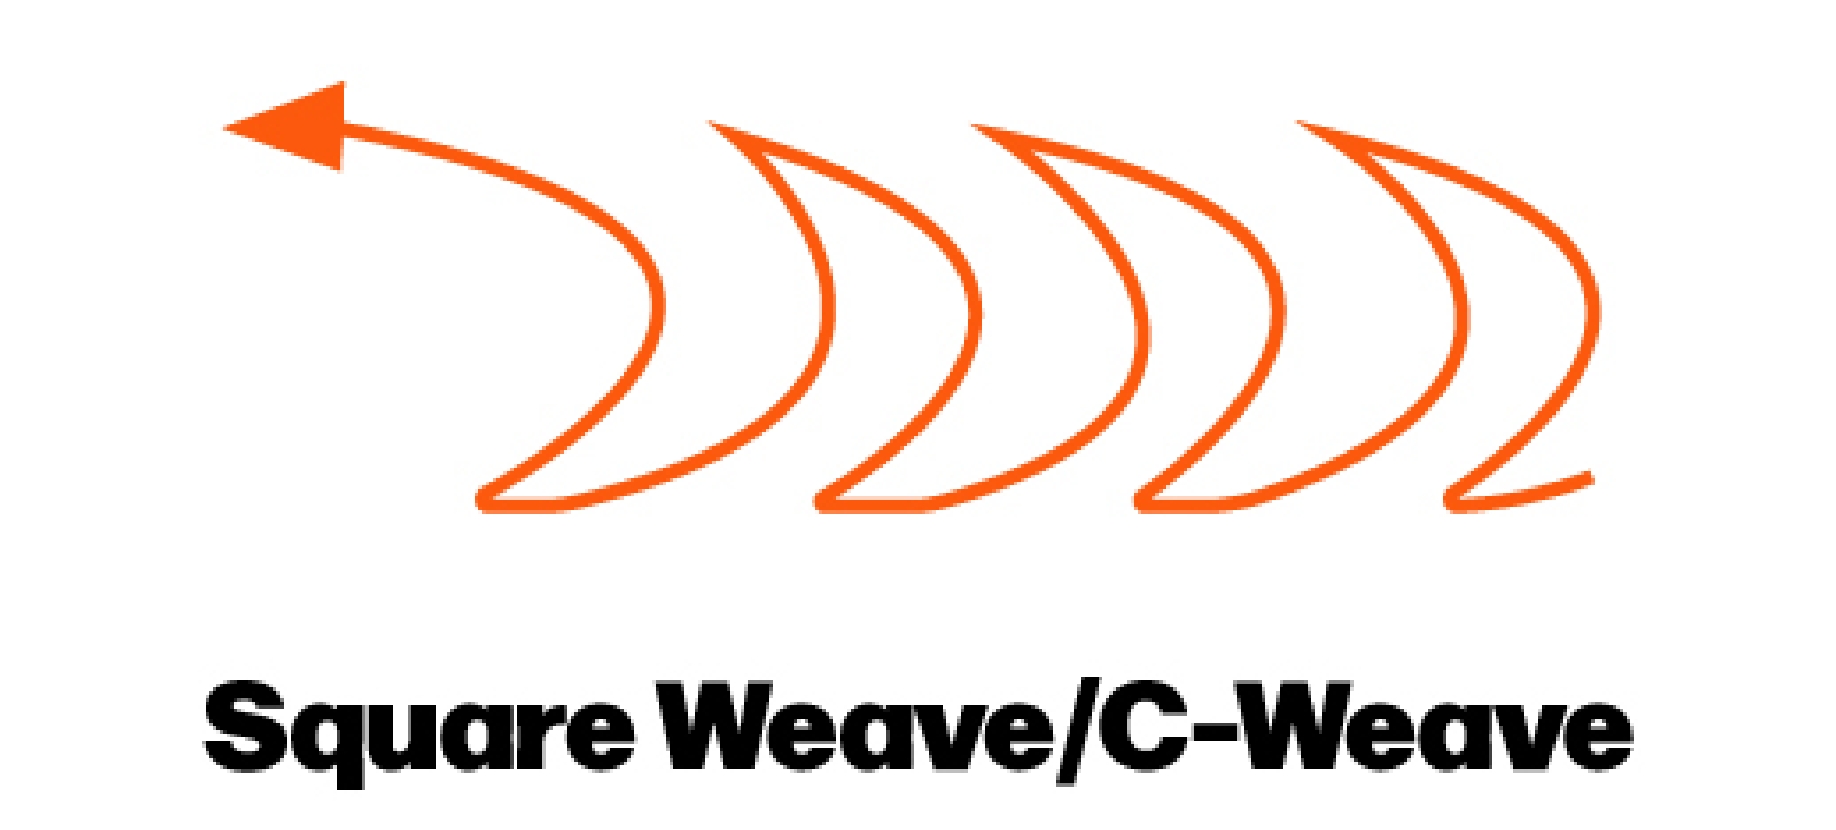
With a square weave, which is also called a C-weave, the torch moves in a smooth, curved pattern to create connected C-shapes. It’s the best choice for handling corners, and it also ensures even heat distribution. This technique is suitable for flat or vertical welding positions and provides excellent sidewall fusion.
- Advantages: Visually aesthetically pleasing, provides good fusion and penetration, ensures even heat distribution.
- Disadvantages: Requires more skill and precision, may increase heat input, may lead to overlap issues, usually has decreased deposition versus a stringer bead.
Circular Weave
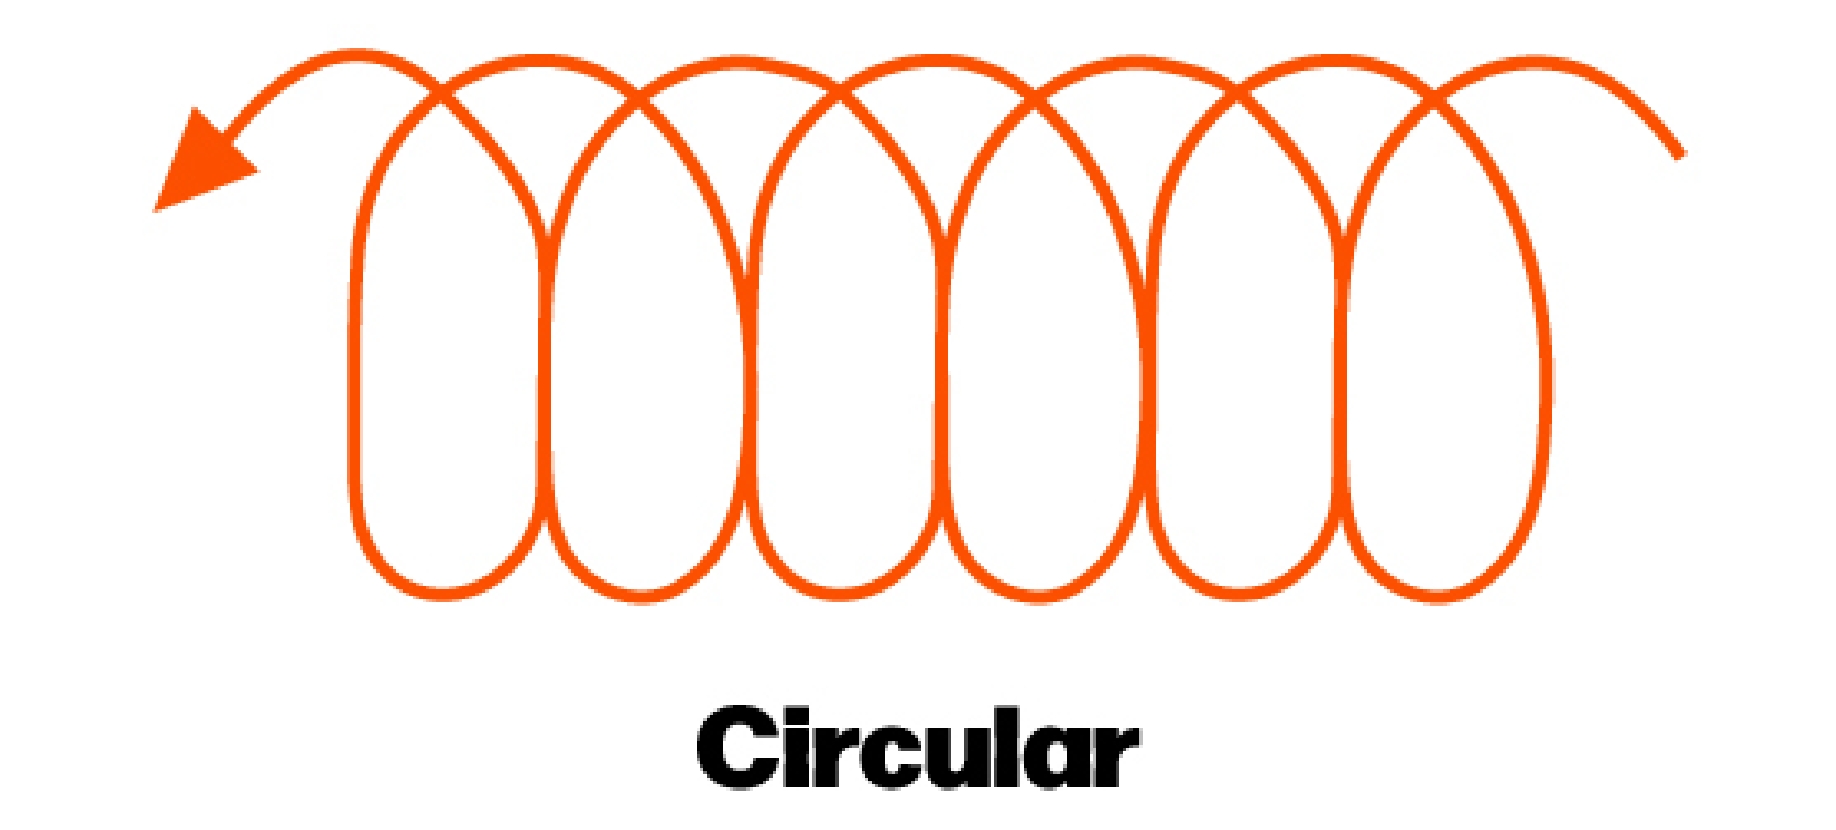
The circular weave pattern requires the welder to move the torch in a circular pattern to create overlapping circles along the joint. It can be difficult to master, but it does provide excellent fusion with high penetration. Suitable for all position welding, this technique is great for surface welds. Circular weave patterns are often found in pipe welding applications.
- Advantages: Creates smooth and durable welds on thicker materials, versatile for all weld positions, ideal choice for pipes.
- Disadvantages: More difficult to perform, not suitable for thin metals, requires high levels of skill when welding out of the flat position.
Zig Zag
With this technique, the torch swings from side to side in a zigzag weave pattern. To get the best result, you need to move quickly through the middle of the weld but spend a bit more time on the edges. With this, the heat gets distributed over a wider area, allowing for wider bead coverage. This technique delivers higher penetration with the ability to fill grooves.
- Advantages: Suitable for vertical and flat position welding, works well on medium and thick metals, offers good penetration.
- Disadvantages: High risk of undercuts, not suitable for thin materials, high heat input.
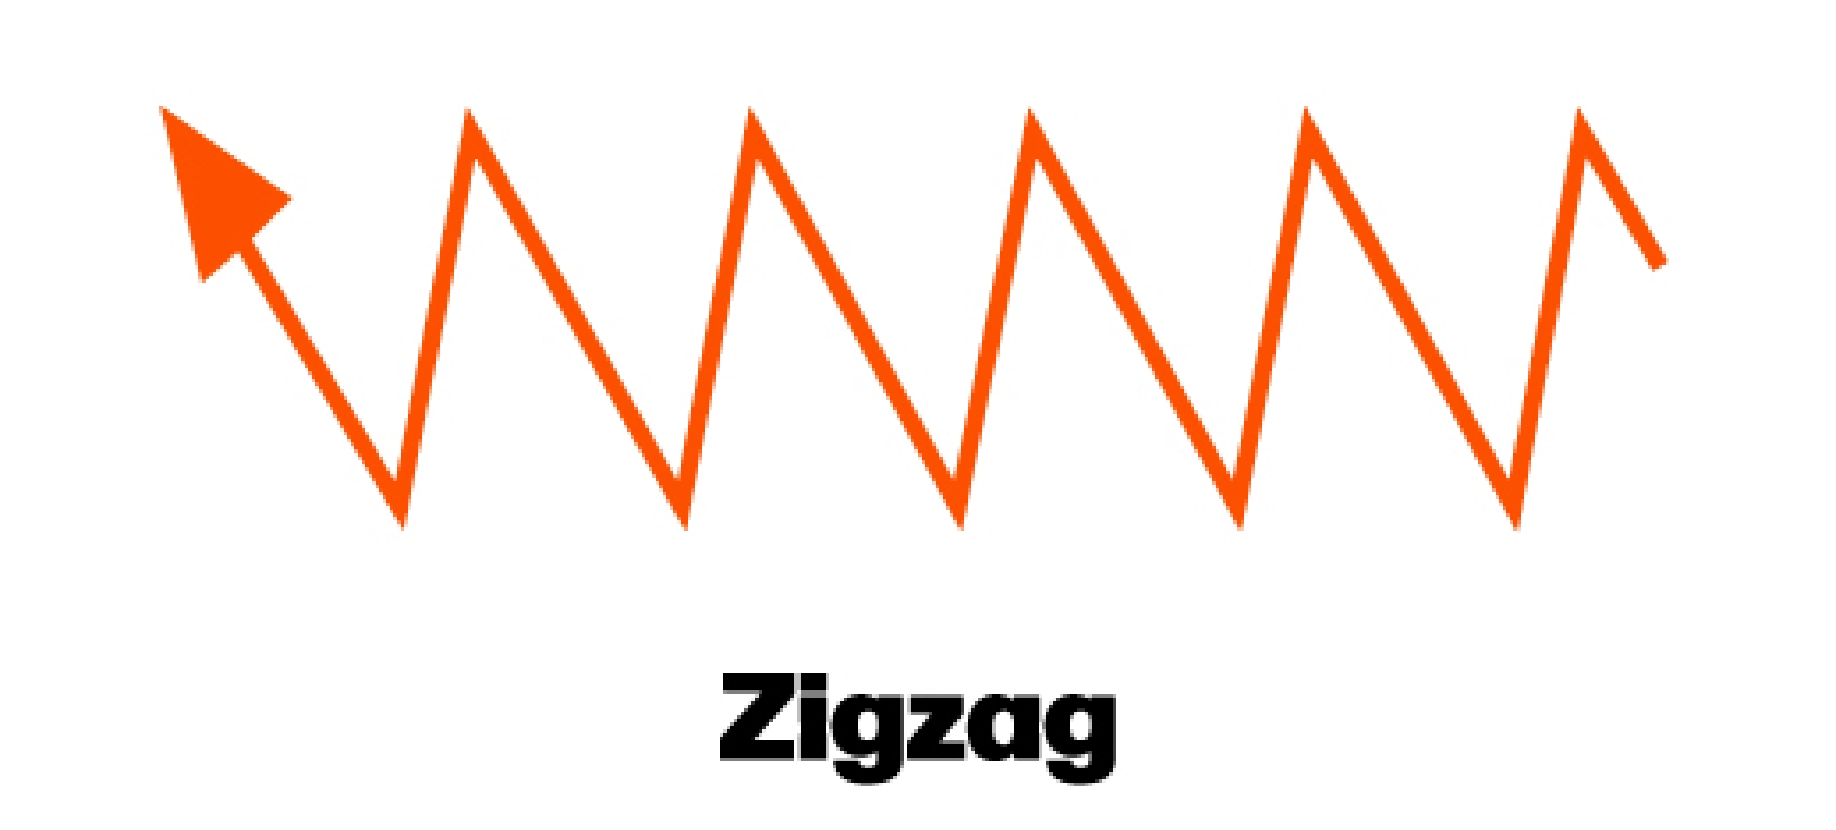
Figure Eight Weave
This technique involves making a figure-8 pattern across the joint that will result in a smooth weld with an interesting appearance. The trick is to spend more time on the edges of the joint and less time on the center. It also requires excessive and consistent movement, which is difficult to perform at first. Although not recommended for horizontal welding positions, this technique is a good choice for making a cover pass in a vertical or flat welding position.
- Advantages: Excellent on thicker materials, visually appealing pattern, good sidewall fusion.
- Disadvantages: Not recommended for horizontal welding position, difficult to weld, high risk of cold lap.

J-Weave
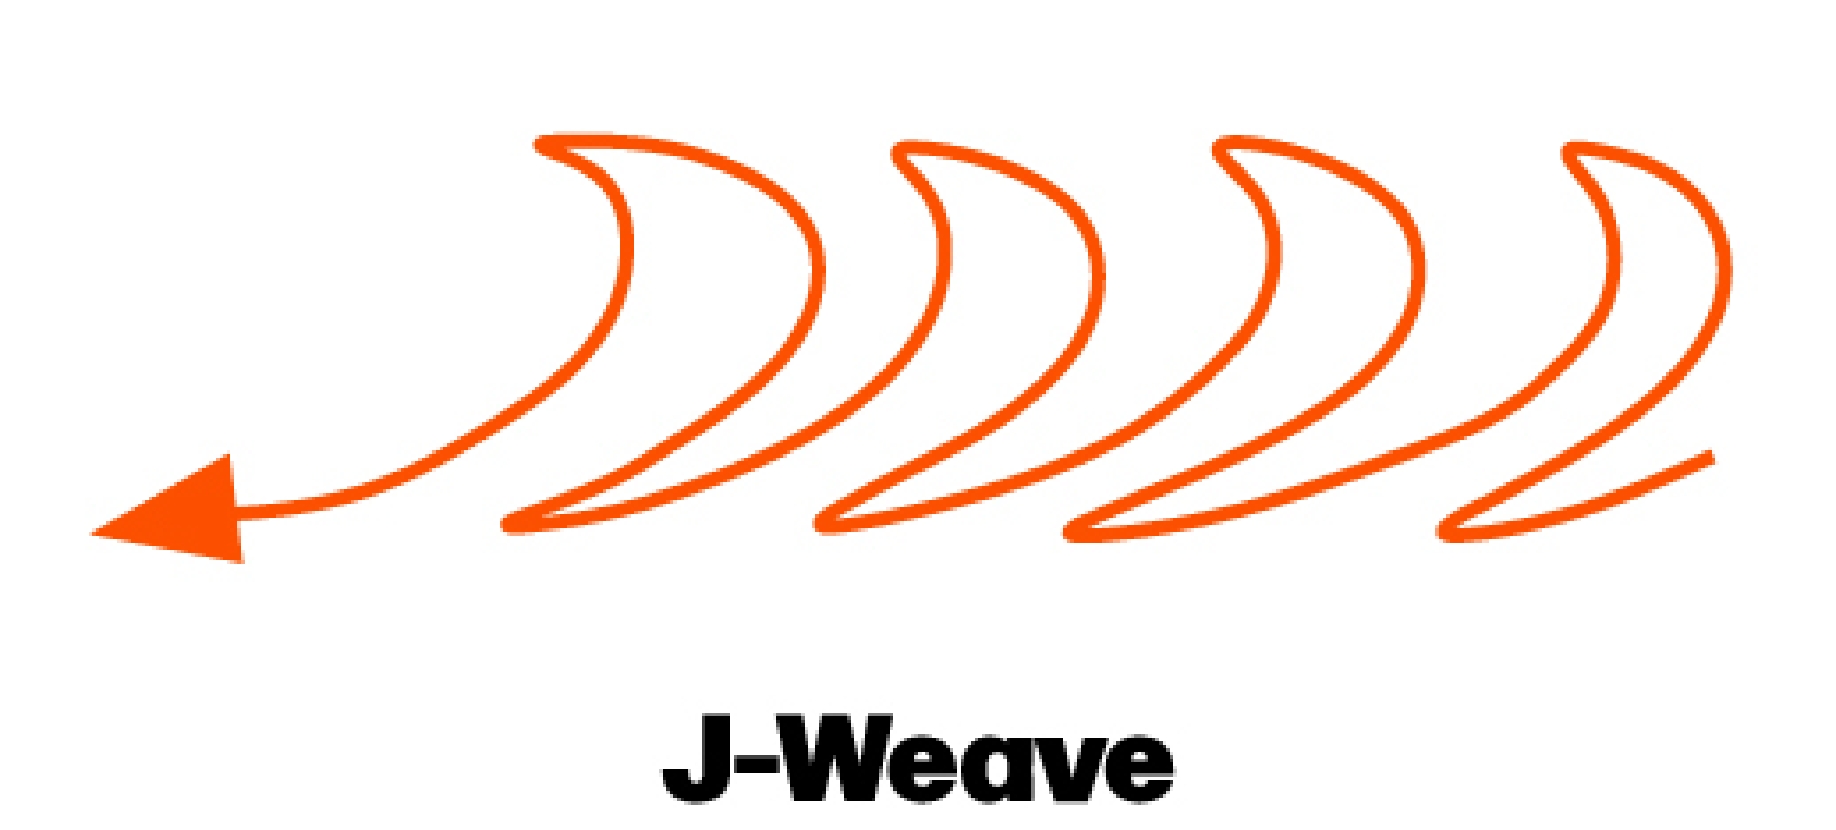
Following a zigzag-like pattern, the J-weave is created with a distinct whip upward to form a “J.” This type of welding pattern can be useful when the open root is a little wider than necessary, so it needs to be tighter. It provides good sidewall fusion and helps manage irregular joint configurations. This technique is most suitable for lap joints and butt welds.
- Advantages: Most suitable for thinner materials, effective on open root weld joints and wide weld joints, good sidewall fusion.
- Disadvantages: High risk of slag entrapment, not suitable for horizontal welding position, difficult to weld with consistency.
Factors to Consider When Choosing Welding Patterns
Deciding which welding pattern to perform for the job is not an easy choice since there are a number of different factors that can influence that decision. From the size and thickness of the material to the welding position, each element shapes how the weld will turn out. Careful consideration needs to be made to create a seamless and high-quality weld.
Base Material Type and Thickness
Each type of base material and its chemical and mechanical properties greatly influence any kind of welding job, so they certainly influence which welding pattern you should use. Their properties affect their thermal conductivities, which in turn affects how the heat is distributed. The material’s size and thickness also play a significant part. Some welding patterns provide higher penetration, which works better on thicker materials, while some narrower patterns benefit from thinner sections of metal in order to prevent burn-through. Whichever welding pattern you choose, it needs to suit the specific characteristics of the base metal and should be properly qualified.
Welding Position
The welding position should also be considered since it plays a significant role in which welding pattern you use. The molten metal and weld pool behave differently depending on the welding position, whether it’s flat, horizontal, vertical, or overhead. Welding patterns need to accommodate for this. For example, the square weave works in both vertical and flat positions since it’s a slightly wider pattern for better sidewall fusion. On the other hand, a stringer bead can be used on all positions, even the more challenging horizontal and overhead positions, due to its simplicity and narrower weave. Remember that the weld should be properly qualified.
Welding Process
Each welding process handles the job differently, which changes how the welding pattern is produced. MIG welding, one of the most straightforward processes to learn and master, can help new welders get a grasp on many basic weaving patterns to help them practice. TIG welding uses filler rods instead of welding wire to form weld beads, but it’s known for creating very visually appealing welds as a result. For more versatile control over the type of welding pattern you want to use, stick welding is the best option. With this process, the filler rods can help produce different and more intricate patterns.
Project Requirements
The entire purpose of the weld is completely based on what the project requires. Some welding projects need unchallenging strength to support the integrity of the structure. In most cases, a solid and consistent stringer weld bead gets the job done, even if it’s not the most visually pleasing. However, some projects may hold the visual appearance of the weld to a much higher degree. That’s when the more complex weaving patterns come into play. The application and specifications of the project are the driving forces behind a weld, and it’s the welder’s duty to deliver above and beyond for a job well done.
A Breakdown on the Relationship Between Welding Patterns and Welding Joints
Certain welding patterns often complement different welding joints, such as butt joints, lap joints, T-joints, and corner joints. Combining the right pattern with the right joint can result in a stronger and more structurally sound weld.
Butt Joints: Butt joints are when two pieces of metal meet in a straight line on a parallel plane. When it comes to butt joints, a stringer weave is often preferred as it evenly fills in the gap. If the application calls for deeper penetration, then the zigzag pattern can be used for better efficiency.
Lap Joints: Lap joints are when one metal piece overlaps the other, so welding patterns that provide excellent overlap are the best choice. Zigzag, circular, and figure eight patterns work best in this case as they create solid connections between the overlapping sections.
T-Joints: The type of joints that form a T shape demand precision and control. Tight and versatile patterns can help fill in the grooves. The figure eight pattern as well as the zigzag pattern are suitable as the exhibit excellent sidewall fusion.
Corner Joints: Corner joints, in which two pieces of metal meet at a 90-degree angle, rely on figure eight welding patterns to get the job done right. This pattern manages corners well as it evenly distributes heat. Additionally, circular patterns can help enhance the strength of the weld.

Practical Tips for Creating Good Welding Beads
Creating good welding patterns with appealing beads can be tricky for a new welder. It takes time and experience to fully master each welding pattern, and there are some that still give veteran welders a hard time. Here are some quick tips to help you hone your skill.
Remember that you can always adjust your welding parameters, even in the middle of the job. Wider patterns need more heat while narrower patterns require less. If you need to change the amperage, voltage, or wire feed speed at any point, do so. This keeps you in control of the weld.
Control is the key to creating a strong weld and an appealing pattern. Your body needs to maintain a comfortable and balanced position with your back straight and your shoulders relaxed. Your hands need to have a solid grip on the gun with your elbows tucked in close. It’s recommended to minimize arm motions and instead move your body at the waist to guide the torch into the welding pattern you want.
Your travel speed needs to be consistent and steady. Moving too fast or too slow can hinder the quality of the weld. The speed needs to be at a point where it allows for proper penetration and fusion but doesn’t run the risk of burn-through.
Learning how to create masterful and complex welding patterns takes time and a lot of practice. We recommend using scrap metal to get used to the motion and flow of the welding torch as you weave it through the metal. Although your travel speed plays a large role in the quality of the weld, we recommend going slowly when you start. You need to feel the motion and recognize the best way to hold the gun and the most comfortable position for your body. As you gain more experience, you’ll get more and more confident in your welding technique. It’ll take tons of practice to become a master of welding patterns.
NS ARC Welding Wires for Enhancing Your Welding Experience
You can’t create a flawless and beautiful welding pattern without the right welding wire, so make sure you’re using NS ARC high-quality welding wire to achieve welds that focus on optimal strength and appearance. NS ARC welding wires stand as a testament to precision and reliability in welding. From stringer beads to intricate weaves, these wires are designed to complement various welding patterns, ensuring optimal performance and durability in the final weld. Contact our team of welding experts to help guide you through our quality selection of carbon steel, stainless-steel, aluminum, flux-cored, and metal-cored welding wires.
Learn more about our entire selection of high-quality MIG welding wires to boost your welding experience.
Learn MoreDISCLAIMER: This information is descriptive in nature and not purely prescriptive. Refer to your own welding machine’s user manual for proper settings and consult a welding expert for support.


